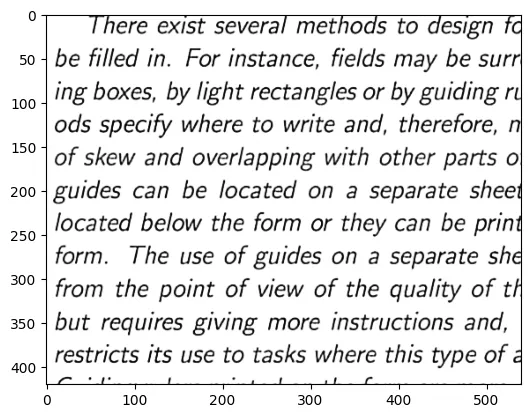
source: https://www.kaggle.com/competitions/denoising-dirty-documents Image denoising isn’t a trivial task. Our goal is to remove the noise from the image while still trying to preserve the detail in the image. One could use some filters like gaussian or median blur, but they don’t work so well on many kinds of images we come across. If an image is too noisy, then these filters would cause the details in the image to also be blurred out. If you have an image like the one given above
You can’t get rid of the big blobs with just some filters, you could use a threshold, then use canny edge detector to denoise it as I explained here. This approach is not very efficient, it requires you to design a model for each type of noisy image and it still may not work very well.
Before we get into how are we going to use deep learning to solve this task, it would be worth noting that image denoising has its applications not just in denoising the image but upscaling, inpainting, and several others.
In this article, I’ll use this dataset, and a simple autoencoder to achieve the task at hand. Let’s start by importing a bunch of libraries.
The dataset is given in the directories train, train_clean and test. To load the dataset I’ve used the following
If you’re wondering why I defined a dataset class, the reason is I want to pair the dirty and clean images for training while still being able to shuffle them. The dataset comprises images of two different dimensions. So, I resized them to (420, 540).
Now, coming to the model. I’m using a very simple model. I would advise you to use a more complex model, and train it for a larger number of epochs than I did.
We would need an optimizer and a loss function. For the optimizer, I’ve used the good old Adam optimizer. For the loss function, I used binary cross-entropy loss as opposed to the popular SSIM because I got rather poor results on the latter. Binary cross-entropy is nonetheless a common loss function used with autoencoders.
Finally, the train function
This part of the code deserves a little explanation. Look at line 6, I’m extracting one dimension out of the images, this is because initially, the image has 3 channels, all of which have the same numbers. To make the training easier, I just used one channel since the values are the same across the channels anyways.
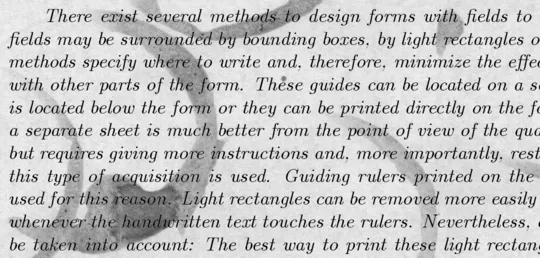
The final result